
How to Plan a Night Sky Session from Your Location
Plan a local night sky session using planets, Moon conditions, twilight, meteor showers and satellite passes. Learn what each forecast can and cannot tell you.
An enjoyable night outside usually begins with one manageable question: what can I see from here, at a time when I can actually go out? A long list of celestial events is less useful if the objects are below your horizon, behind a building or lost in twilight. Start with Night Sky Tonight and treat the session as a local plan. You do not need to recognise every constellation or own a telescope to choose a worthwhile target.
Give your eyes and surroundings some attention Take time to become familiar with the site before searching for a faint target. Find a comfortable stance or seat, identify the clear part of the horizon, and reduce unnecessary bright-screen use. Nearby lights can be more distracting than a broad city glow, especially if they shine directly into your eyes. A small change in where you stand can sometimes improve the view more than changing the prediction settings.
For a group session, agree on landmarks and use plain directions. Saying that a target is above a particular roof corner is often more helpful than calling out a number without explaining its reference. Bring people into the observation gradually: identify one bright point, follow its direction, and then compare the chart. The tools support the experience, but the real goal is spending enough attentive time with the sky to connect a label with something you can recognise.
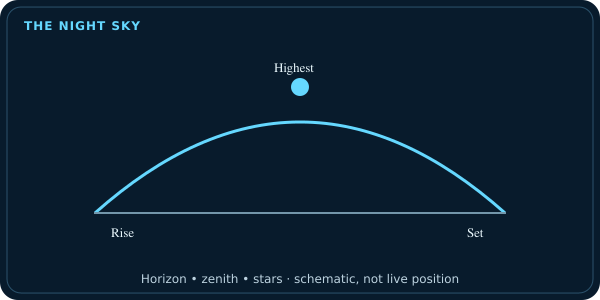
The best routine combines a few kinds of information rather than trusting one score. Direction and altitude describe the geometry. Sun and Moon conditions affect the background sky. Cloud, haze and your local surroundings determine what is possible in practice. NASA's skywatching guidance provides helpful observing context; the site tools let you apply it to a selected place and time.
Choose the location and session time first Check the location displayed by the site before reading a forecast. A saved city from an earlier visit can produce convincing-looking results for the wrong sky. Use the existing site-wide location setting and keep it consistent as you move between tools. There is no need to set a different observer independently on each page.
Next, decide when you can observe. The present sky and the sky several hours later are different, even on the same evening. A target low in the east may rise higher later, while an object in the west can disappear before you leave home. If a page shows current values, do not read them as a forecast for an arbitrary later time. Use the date or planning controls provided by that particular tool.
Start with one bright, identifiable target The Moon and bright planets are useful first targets because they are often easier to recognise than faint deep-sky objects. Planets Visible Tonight helps narrow the list to local opportunities. Check altitude as well as the object name: a bright planet can still be hidden by a rooftop when it is low.
If a conspicuous point appears beside the Moon, use Planet Near the Moon to check the candidate rather than guessing from brightness. Their closeness in the sky is an apparent alignment, not evidence that the planet is physically near the Moon. The pattern changes as the Moon moves, so an identification from another evening may not apply tonight.
Know when twilight ends Sunset is not the instant the whole sky becomes dark. Twilight continues as the Sun drops farther below the horizon. A bright Moon or planet can be rewarding earlier, while faint stars and the Milky Way usually benefit from darker conditions. Use Twilight Times to understand that transition for your location.
At some high-latitude locations, a particular darkness threshold may not be reached during part of the year. That is a real seasonal condition rather than a missing calculation. Read the labels instead of expecting a time for every twilight stage on every date. Then choose a target suited to the available sky rather than waiting for darkness that will not occur that night.
An illustrated chart is a guide to calculated sky relationships, while the view outside depends on darkness and your horizon. Read NASA’s skywatching FAQ when you want to check the underlying context rather than infer it from a thumbnail or summary number. Compare it with the night sky tool for the selected question.
Check the Moon before planning faint targets Moonlight changes how easy it is to see faint detail. A bright Moon above the horizon can reduce contrast even when the weather is clear. The phase alone is not enough: a bright Moon that has already set affects a later session differently from one high in the sky. Combine Moon Phase Tonight with Moonrise and Moonset.
For a Milky Way session, use Milky Way Visible Tonight as a planning aid and check the relevant local geometry. A broad seasonal opportunity is not a guarantee that the galactic structure will be visible from a bright city centre. Darker surroundings and a clear horizon often matter more than another decimal place in a sky calculation.
Use constellations as landmarks Constellation patterns can help you orient yourself, but a drawing on a screen is only a guide. The stars differ in brightness, and a bright background can hide the fainter connecting points. Begin with a recognisable portion of a pattern from Constellations Visible Tonight rather than expecting every line to be obvious at once.
Compare the chart's orientation with your direction of view. A pattern can look rotated as it crosses the sky, and a phone compass can be affected by nearby metal. Identify one bright star and build outward from it. With repeated sessions, those landmarks become more useful than repeatedly scanning an entire labelled map without connecting it to the real horizon.
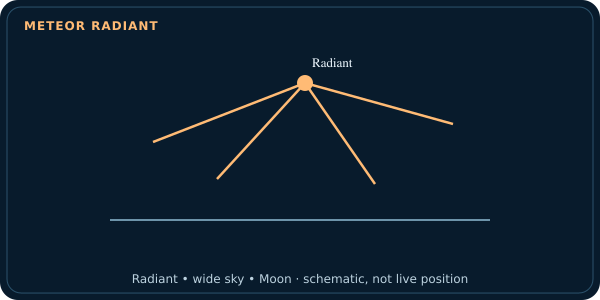
Meteor showers need patience and a wide view A shower's named radiant is the direction from which its meteor paths appear to spread. It is not a small spot where you must stare continuously. Use Meteor Shower Tonight for planning context, then choose a comfortable position with a broad open sky.
Published peak rates are often idealised descriptions, not the number a particular observer will count each hour. Moonlight, cloud, radiant height and light pollution can reduce what you see. NASA's meteor explanation helps distinguish the physical event from the prediction. Allow enough time to watch rather than concluding after a few minutes that the shower failed.
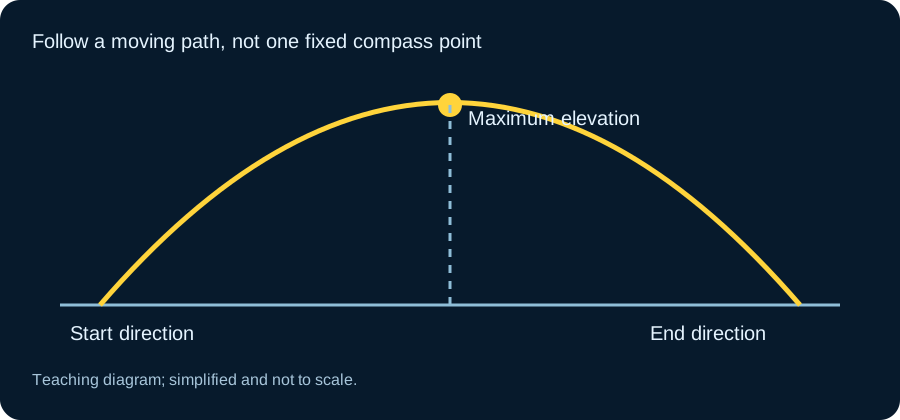
Satellites and comets require different expectations A satellite pass lasts a limited time and moves across the sky. Check ISS Visible Tonight or Starlink Visible Tonight before the session, noting the start direction and peak height. A geometric pass still needs favourable illumination to become an easy naked-eye sighting.
A comet or asteroid is a different observing challenge. Comets Visible Tonight and Asteroids Passing Earth Today provide context, but a listed object is not necessarily visible without optical equipment. Do not treat a close approach distance as a brightness forecast. Check the object's observing information and equipment requirements before adding it to a beginner's shortlist.
Finish with a realistic plan and a small record Choose one main target and one alternative. Note the useful time, direction, height and the part of your horizon that is clear. Best Time to Stargaze can help compare conditions, but inspect its explanation rather than treating a summary rating as certainty. Check local weather shortly before leaving.
Afterward, record what you actually saw and what blocked the view. A missed object can teach you about the observing site, just as a successful sighting teaches you about the sky. Keep current skywatching context with NASA's observing resources and return to the local tools for the next session. A short, repeatable routine is more useful than an ambitious list that never reaches the real sky.
Separate your shortlist from the whole catalog
The sky page can show more objects than you could reasonably observe in one evening. Keep a short list with the selected date, local time and a reason for each target. A bright planet might be the main goal and the Moon an alternative if haze affects faint stars. Do not add a target simply because its name is present. Check the direction and altitude so the plan fits the part of the sky you can actually see.
Continue with the night sky tool for the selected question, and keep NASA’s skywatching FAQ beside the result when you need its definitions or broader context.