
Astronomy Calculators: Units, Equipment and Useful Results
Use astronomy calculators for telescopes, imaging, distances and orbital examples. Check units, assumptions and precision before interpreting a result.
A good astronomy calculator answers a clearly defined question with clearly labelled inputs. It should help you understand the result, not merely produce a long number. The Astronomy Space Calculators directory contains tools for observing equipment, imaging, distances and simplified orbital relationships. Choose the one that matches your question before entering values.
Formula results and live ephemerides are different kinds of information. A calculator can explore an ideal model, while a tracker describes a selected object's time-dependent position. NASA's Basics of Space Flight provides useful background for the orbital concepts; the local tools make specific examples easier to explore.
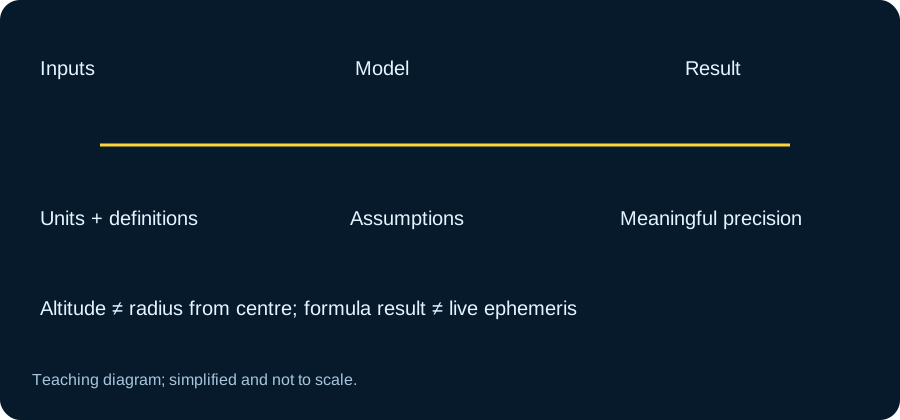
Begin with units and definitions Check whether an input expects millimetres, kilometres, metres, degrees or another unit. A number can be perfectly valid numerically while being wrong for the expected unit. Do not paste a value from a different source until you have checked both labels. The same care applies to the output.
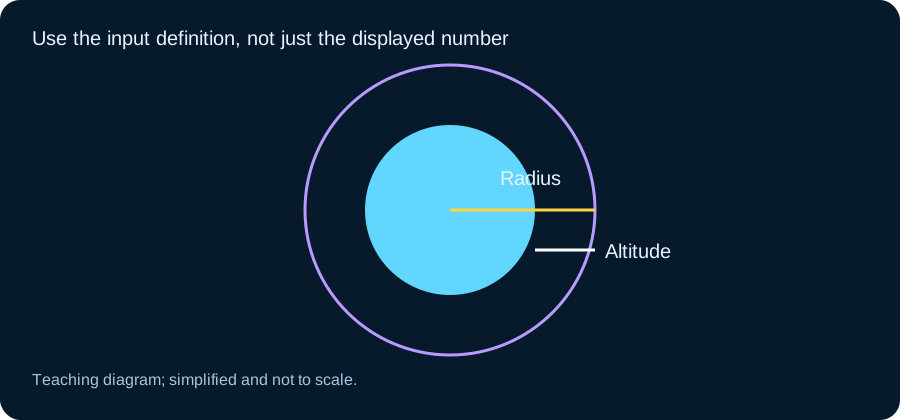
Also read the definition of the input. Orbital altitude above a surface is not the same as radius from a body's centre. Camera pixel size is not the sensor's total width. A telescope's aperture is not its focal length. Most dramatic calculator errors in everyday use begin with one of these mismatches, not with a difficult equation.
Magnification is a ratio, not image quality Telescope magnification follows from the telescope and eyepiece focal lengths in the simple arrangement described by the tool. A shorter-focal-length eyepiece increases the ratio, but that does not guarantee a sharper or more useful view. Atmospheric seeing, aperture, optical quality and the target all matter.
Use the telescope-magnification tool to compare configurations, then consider the observing conditions. A very large number can make an image dim or unsteady without revealing more detail. Choose a practical result for the target instead of treating maximum magnification as the goal. The calculator explains one relationship within the whole observing system.
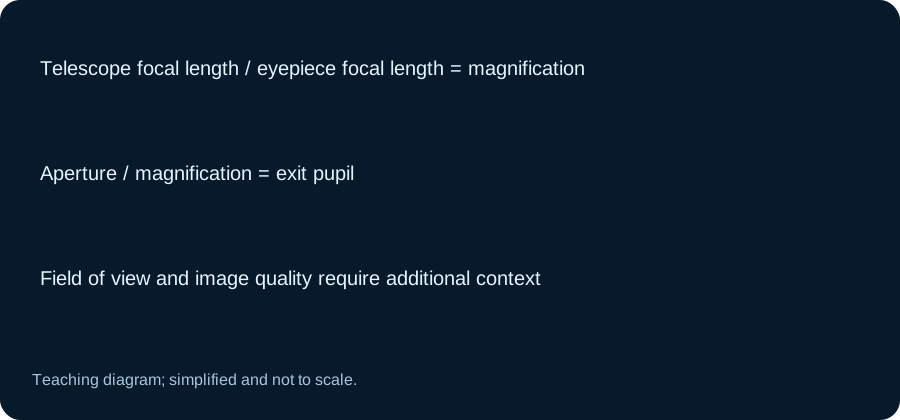
Field of view tells you how much sky fits An eyepiece's apparent field and a telescope's true sky field are related but different. A simple field-of-view estimate can help determine whether a target or star pattern fits, yet optical details and the field stop can affect precision. Read which method the calculator uses.
For a broad star cluster or a moving satellite, a wider useful view can be more valuable than high magnification. For a small planet, another setup may be appropriate. Keep the target's angular size in mind when comparing configurations. A field estimate should help select equipment, not imply that every object inside the circle will be bright enough to see.
Exit pupil connects aperture and magnification Exit pupil describes the bundle of light leaving the eyepiece. In the basic relationship, it depends on aperture and magnification. A lower magnification produces a larger exit pupil for the same telescope. The observer's own pupil and the target then affect how that light is used.
Use the exit-pupil calculator as a comparison tool, especially when choosing among eyepieces you already have. Do not interpret it as a personal eyesight measurement. The number helps explain differences in image brightness and equipment choice, but it does not replace a real observing test under the conditions in which you will use the telescope.
Imaging scale needs the right camera measurement Astrophotography pixel scale relates a camera's pixel size to the optical focal length under the formula's assumptions. It describes angular sampling, not a guarantee of resolution. Seeing, tracking, focus, optics and processing all affect the final image.
Check whether the pixel-size input expects micrometres and whether the focal length includes any reducer or amplifier in use. A nominal telescope specification can differ from the effective imaging setup. Record the configuration with the result. This gives you a useful comparison rather than a number that appears precise but belongs to equipment you are not actually using.
Formula assumptions are part of the result, especially when a simplified orbital example is compared with an actual mission. Read NASA’s Basics of Space Flight when you want to check the underlying context rather than infer it from a thumbnail or summary number. Compare it with the calculator directory for the selected question.
Angular size is different from physical size A large distant object can occupy a small angle, while a smaller nearby object can look larger. The angular-size calculator links physical size and distance under its stated geometry. Keep those two inputs in consistent units before interpreting the output.
Compare the result with a field-of-view estimate to see whether an object fits in an image or eyepiece. Remember that fitting is not the same as being detectable. Surface brightness, contrast and background light matter too. A diagram can show an object's footprint without proving that the observing setup will reveal its detail.
Light time makes distance tangible A light-travel-time calculation converts distance into the propagation time at light speed. It is useful for understanding communication with deep-space missions. One-way propagation is not the complete turnaround for a command, spacecraft processing and a returned message.
Use the Voyager communication guide to connect the formula with real operations. If you need a current spacecraft distance, obtain it from the relevant tracker rather than inventing a permanent value. State the time and distance reference when comparing the result with another source.
Orbital formulas need an explicit model Circular orbital speed and a simplified period can be explored with a central-body model. Real trajectories can include eccentricity, perturbations, maneuvers and multiple-body effects. A classroom circular-orbit result is not a replacement for a spacecraft ephemeris or a fresh satellite element record.
Check whether the radius is measured from the centre before entering an altitude. The distinction can cause a substantial error. For actual tracking conventions, read TLE/SGP4 and JPL Horizons. The two kinds of tool complement each other when their assumptions are clear.
Weight, magnitude and habitability require careful language An educational weight comparison changes the gravitational force associated with a chosen surface reference; it does not change the person's mass. Gas giants do not offer an ordinary solid surface on which to stand, so the comparison uses the tool's stated convention.
Magnitude calculations need the relevant distance and assumptions, including whether extinction is included. A simple habitable-zone estimate concerns stellar illumination under a model, not proof of life or a complete climate prediction. NASA's habitable-zone explanation provides the broader scientific context. These qualifications are part of a useful result, not obstacles to using the calculator.
Change one input at a time When exploring a formula, keep the other values fixed and change one input deliberately. Double an eyepiece focal length, for example, and observe the magnification ratio's response. Then return to the original setup before trying another change. This gives the result a physical meaning instead of producing a series of unrelated numbers.
For orbital or distance tools, keep the central body and unit convention fixed during the comparison. A change of reference can alter the answer for a different reason from the parameter you intended to test. Write the assumption next to the example so another reader can reproduce it. A calculator becomes a learning tool when the trend is understandable and the inputs are visible, rather than a machine that appears authoritative because its output contains many digits.
Check a result before sharing it Write the input values, units and method alongside the output. Try a simple known relationship or change one input to see whether the trend makes sense. Round the result to a sensible precision for the inputs rather than assuming every displayed digit is physically meaningful.
Return to the calculator directory for the next question and use a live tracker when you need current geometry. A good calculator session leaves you understanding why the result changes. That understanding is more valuable than a screenshot of a number detached from its units and assumptions.
Keep examples reproducible
A worked example should state the chosen input values and units instead of implying they describe the reader's own equipment or a current spacecraft. If the model is idealised, keep that word beside the result. Another person can then enter the same values and check the trend. This is a useful educational test even when the formula is too simple for professional observing or mission analysis.
Continue with the calculator directory for the selected question, and keep NASA’s Basics of Space Flight beside the result when you need its definitions or broader context.