
How to Use Live Sky AR: Direction, Permissions and Alignment
Learn how to use Live Sky AR with camera, location and orientation permissions. Check sky direction, calibration, daytime labels and observing limits.
Pointing a phone at the sky feels intuitive, but a useful augmented-reality view needs more than a camera image. The tool must know the observing location, time and phone orientation, then relate calculated object directions to that view. Live Sky AR helps explore that relationship. Its labels are calculated pointers, not proof that the camera has detected the objects shown.
Begin with a bright object you can identify independently, such as the Moon at a suitable time. This makes calibration easier and gives you a practical check before trusting a label for something faint or below the horizon. For broader observing preparation, NASA's skywatching FAQ is a useful companion to the local interface.
Confirm the observing location and time The site's existing location setting supplies the observer context. Check it before starting the camera view, particularly if you have travelled or previously searched another city. A correct-looking overlay for the wrong coordinates can still point at the wrong part of your local sky. Keep the site-wide setting consistent with the other sky tools.
An accurate device time matters too. Earth rotates, the Moon and planets change apparent position, and artificial satellites move quickly. The tool's current directions are associated with a time, not a permanent position in the landscape. If your device clock or selected time is wrong, rechecking the compass will not solve the resulting alignment problem. Establish position and time before adjusting the orientation.
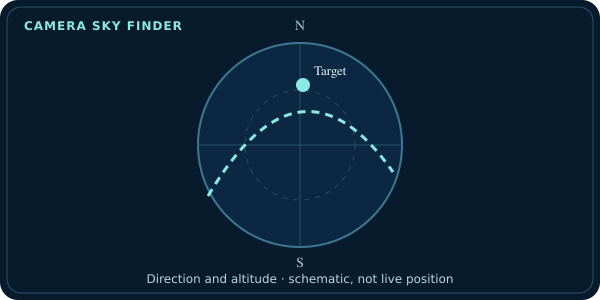
Understand what each permission does Camera access lets the page show the view behind the labels. Location access, when used, provides observer coordinates. Orientation or motion access can help the interface follow the phone's direction. These are distinct capabilities, and a browser may request them through different controls. Read the on-screen prompt instead of assuming one approval enabled everything.
If a permission is unavailable or declined, follow whatever manual or non-camera option the page provides. Do not repeatedly tap unrelated controls expecting a blocked sensor to start. Browser and device support varies, and some permissions need a deliberate user action. A sky calculation can still be educational when the camera or automatic orientation is unavailable, but the interface should be interpreted according to the capabilities actually active.
Use a steady stance for the first alignment Stand in an open area away from parked vehicles, metal railings and magnetic accessories. Hold the phone in the orientation expected by the interface and move it slowly. Sudden swings can make sensor behaviour harder to interpret. Begin by looking toward a known broad direction rather than trying to place a tiny label exactly on a star.
Compare the overlay with a bright confirmed target. If the offset is large, check north reference, sensor calibration and phone posture. A compass can respond to magnetic north while astronomical azimuth is usually defined from true north. Software may correct that difference, but do not assume every device and display uses identical conventions. Azimuth and elevation explained provides the direction vocabulary needed for the comparison.
Treat the camera image and the calculation separately The camera records what the phone can see under current lighting and exposure settings. The sky model supplies directions for selected objects. A planet label can therefore be present even when the camera shows no visible point at that location. Cloud, daylight, brightness and limited camera sensitivity can all explain the difference.
Likewise, a star in the camera frame is not automatically the target closest to its screen position. Phone lens geometry, orientation error and display projection affect alignment. Use the overlay to guide a search and then confirm an identification with a chart or known pattern. Night Sky Tonight gives another way to inspect the local sky without relying on exact camera registration.
Daytime labels show calculated positions A daytime sky view can show where the Sun, Moon, planets or stars are calculated to lie even when many are invisible against the bright background. That is a valuable teaching feature: objects do not vanish from space when the ground becomes bright. It does not mean the camera has photographed those objects or made faint stars visible through sunlight.
Keep the Sun's calculated label separate from direct solar observation. Do not use a phone, binoculars or a telescope as an excuse to stare at the Sun or point an optical instrument toward it without the appropriate safe solar setup. NASA's solar-observing guidance explains the relevant precautions. The AR view is most useful for understanding direction, with the device held and used sensibly.
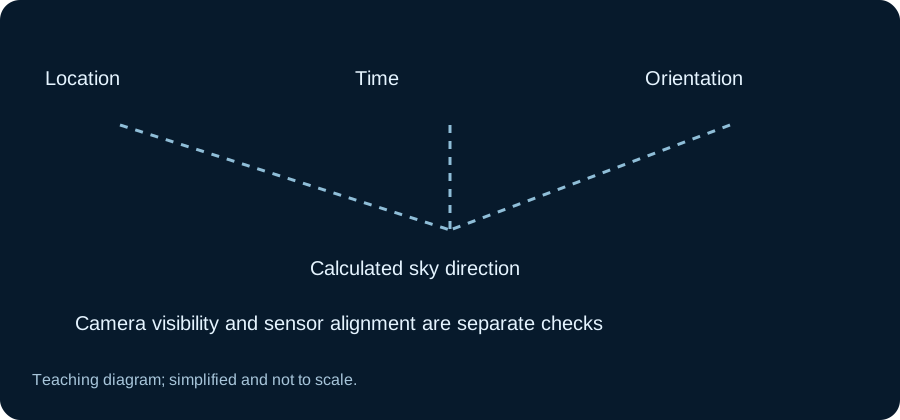
Orientation events are supplied by the browser and device; a calculated target direction does not remove sensor limitations. Read MDN’s device-orientation documentation when you want to check the underlying context rather than infer it from a thumbnail or summary number. Compare it with Live Sky AR for the selected question.
A moving satellite is a harder alignment test Satellite position changes fast compared with a familiar star pattern. A sensor offset, update interval or incorrect time can make a label lag or miss the moving point. Start with slower sky targets before trying a brief station pass. Prepare the direction and peak elevation from ISS Visible Tonight before opening the AR view.
During the pass, look at the actual sky as well as the screen. The moving light can be easier to follow with unaided eyes than through a narrow phone view. An AR label is an aid, not a guarantee of optical visibility. If the station is in shadow or behind cloud, a calculated direction can remain valid even though the light is not visible.
Know when a label is only educational context Deep-space spacecraft and faint objects are generally not ordinary phone-camera targets. If the interface supports a calculated direction to such an object, the label tells you where to orient conceptually. It does not make Voyager or Webb appear as a visible object in the camera. Use their mission trackers for distance and trajectory context instead.
For planets, a confirmed bright target is a more useful practical test. Compare its direction with Planets Visible Tonight and note whether it is above your horizon. A below-horizon direction explains a missing object without any sensor failure. Read the selected target and altitude before repeatedly recalibrating the phone.
Use the overlay without losing the real horizon It is easy to spend the whole session looking through the phone and miss how the target relates to the landscape. Lower the device occasionally, identify the direction with your eyes, and compare the label with the actual sky. A building can block an object with positive calculated altitude; the camera cannot make that obstruction transparent. The distinction between a geometric horizon and your local skyline still applies in AR.
If the interface places many labels together, concentrate on one selected target before exploring the rest. Dense labels can overlap even when the underlying positions are distinct. Zoom or selection controls may help, but they do not increase camera sensitivity or improve sensor calibration by themselves. A simple target and a deliberate comparison are more useful for learning the tool than rapidly switching between objects while the phone is still moving.
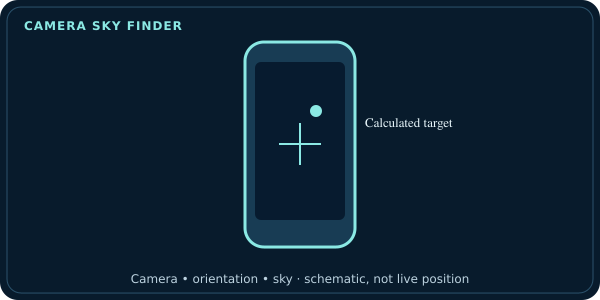
Keep a simple alignment record If the view appears consistently offset, note the device, browser, target, location, time and approximate direction of the error. Say which permissions were enabled and whether the camera was active. This makes an issue reproducible and distinguishes a permission problem from a calculation or orientation problem.
For ordinary use, finish with the experience rather than the diagnostics: choose a bright target, establish the horizon, move slowly and confirm what you can actually see. Return to the sky-planning guide when you need a session plan. AR becomes rewarding when it connects calculation with observation while keeping the difference between a label, a camera image and a confirmed sighting clear.
Check the same target in two views
Compare one identified object in the non-camera sky page and the AR view at the same time. If their numerical direction agrees but the camera label is displaced, investigate orientation or projection rather than changing the orbit data. If the directions themselves differ, record the selected target and time. This comparison narrows the question and keeps a calibration problem from being confused with object visibility.
Continue with Live Sky AR for the selected question, and keep MDN’s device-orientation documentation beside the result when you need its definitions or broader context.